
How to Make Blown Easter Egg Decorations
Create A unique Easter decoration on budget at home
The blown egg is only the eggshell while egg white and yolk is removed.
As a child, I remember celebrating Easter by blowing eggs and decorating them with paint, ribbons, stickers, rhinestones, feathers, and with whatever you could find in your art bin. By blowing eggs, you can make art on a budget since you already have eggs in your refrigerator. You don’t have to buy wooden or plastic eggs.
With this process, you will preserve the egg, which you can reuse years to come. If it brakes you can make a new one! You can create unique Easter decorations, perhaps create a family keepsake as your child’s artwork improves, create a gift for grandma, the ideas are endless.

WHAT YOU NEED FOR THIS PROJECT:
egg
knife (or any object with a sharp point)
skewers (to brake the egg yolk)
two small containers (one for the egg yolk and egg white and the other for water/vinegar)
water and vinegar 1:1
scissors for ribbon cutting
color ribbon
paint and other decorations you desire to create with
STEP BY STEP HOW TO MAKE ORNAMENTS:

1. Get all the supplies ready. Of course, you will need an egg. Then a sharp object to pierce your egg, a few skewers to break the yolk, and two small containers for the egg and also vinegar mixture to clean/disinfect your egg. Lastly, if you want to suspend your egg, have scissors and ribbon ready as well.

3. Make a hole on the bottom of the egg. Turn the egg over and pierce the other end the same way you did on top.

2. Make a hole on top of the egg. Starting at the narrow end of the egg, gently pierce a hole through the shell and membrane with a straight point (a knife or drill with dremel tool). If you are planning on using the ribbon to suspend the egg, make sure that the hole is large enough for the fabric to get through.

4. Pierce the yolk. Insert a wooden skewer through the bottom hole you have created and gently swirl inside to brake the yoke. By breaking the egg yolk you will make blowing the egg much easier.


5. Ready to blow the egg. Press your lips over the hole on the top of the egg, and blow the raw egg out into a container.
TIP: You can cut a piece of straw and insert it in the hole instead of touching the egg with your lips.

6. Clean and disinfect. Rinse the inside and outside of the shell with a 1:1 mixture of vinegar and water. Submerge the egg under the solution for few minutes then let it float before wiping the egg off with a kitchen towel or paper napkin.
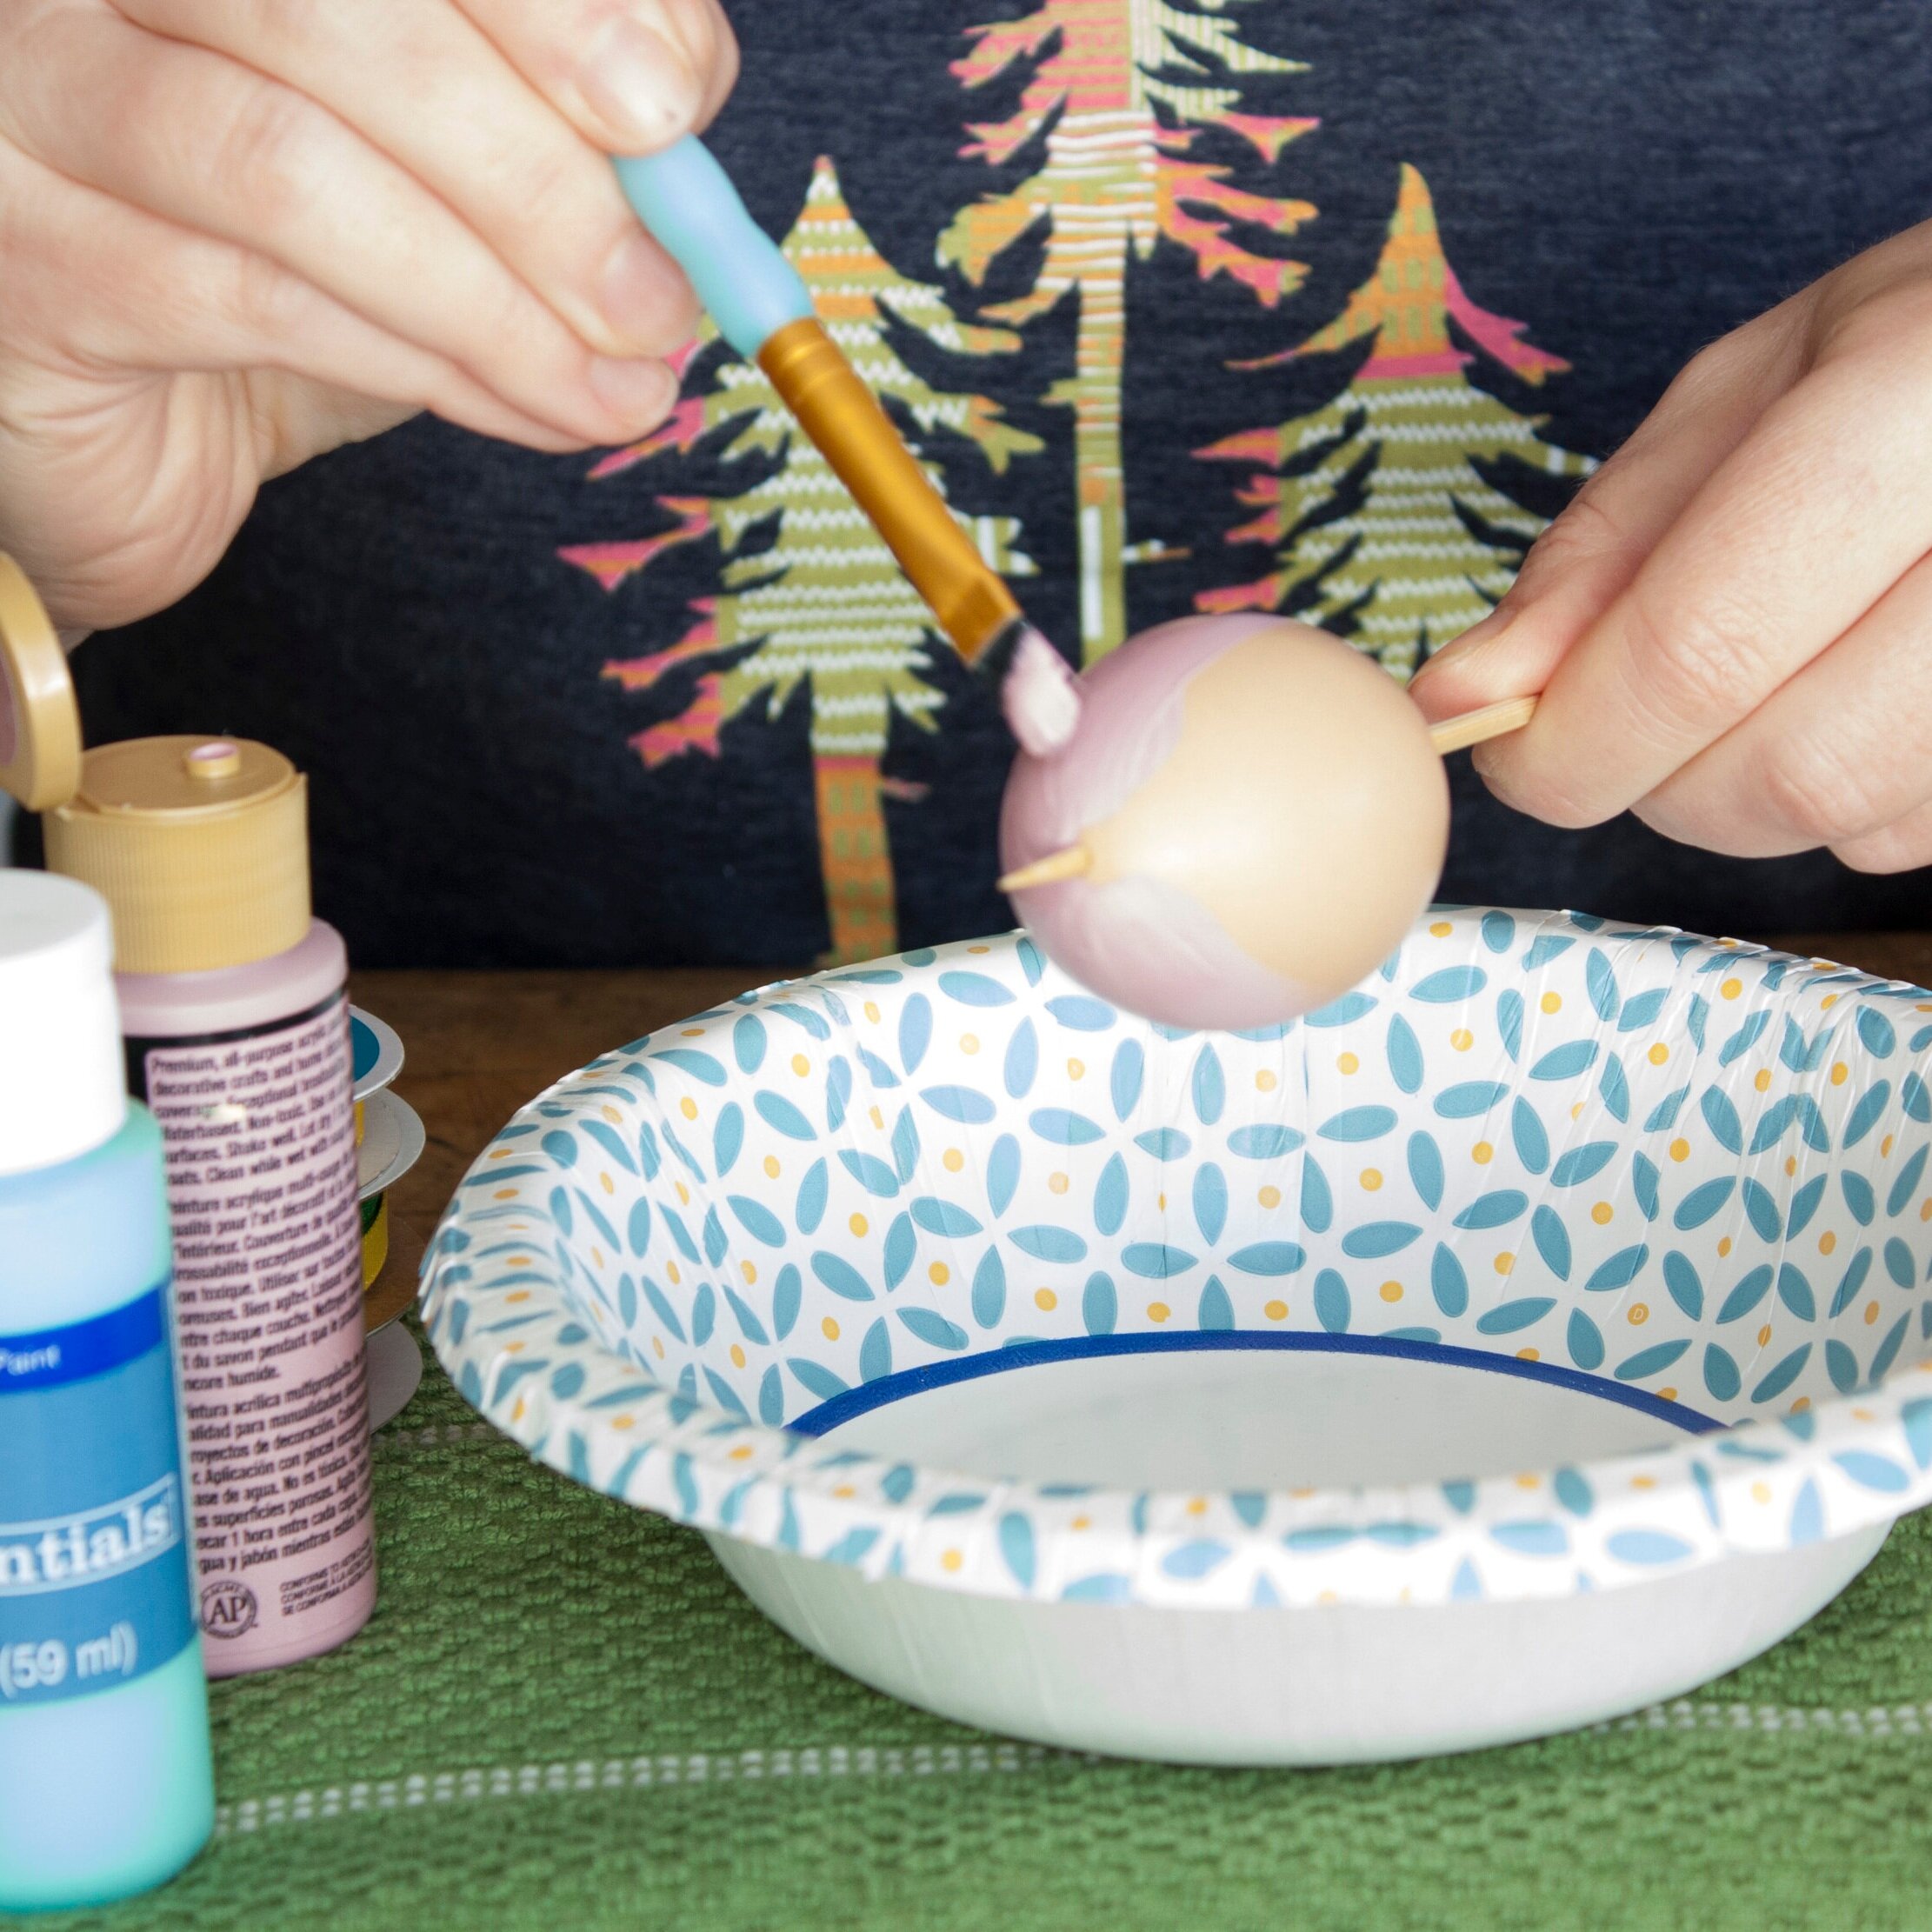
7. Decorate. Use paints, stamps, colored tissue paper, or whatever you desire to decorate your blown egg.
TIP: I like to use a wooden skewer to hold my egg, so I don’t get my hands dirty, and I’m able to rotate the egg easily.
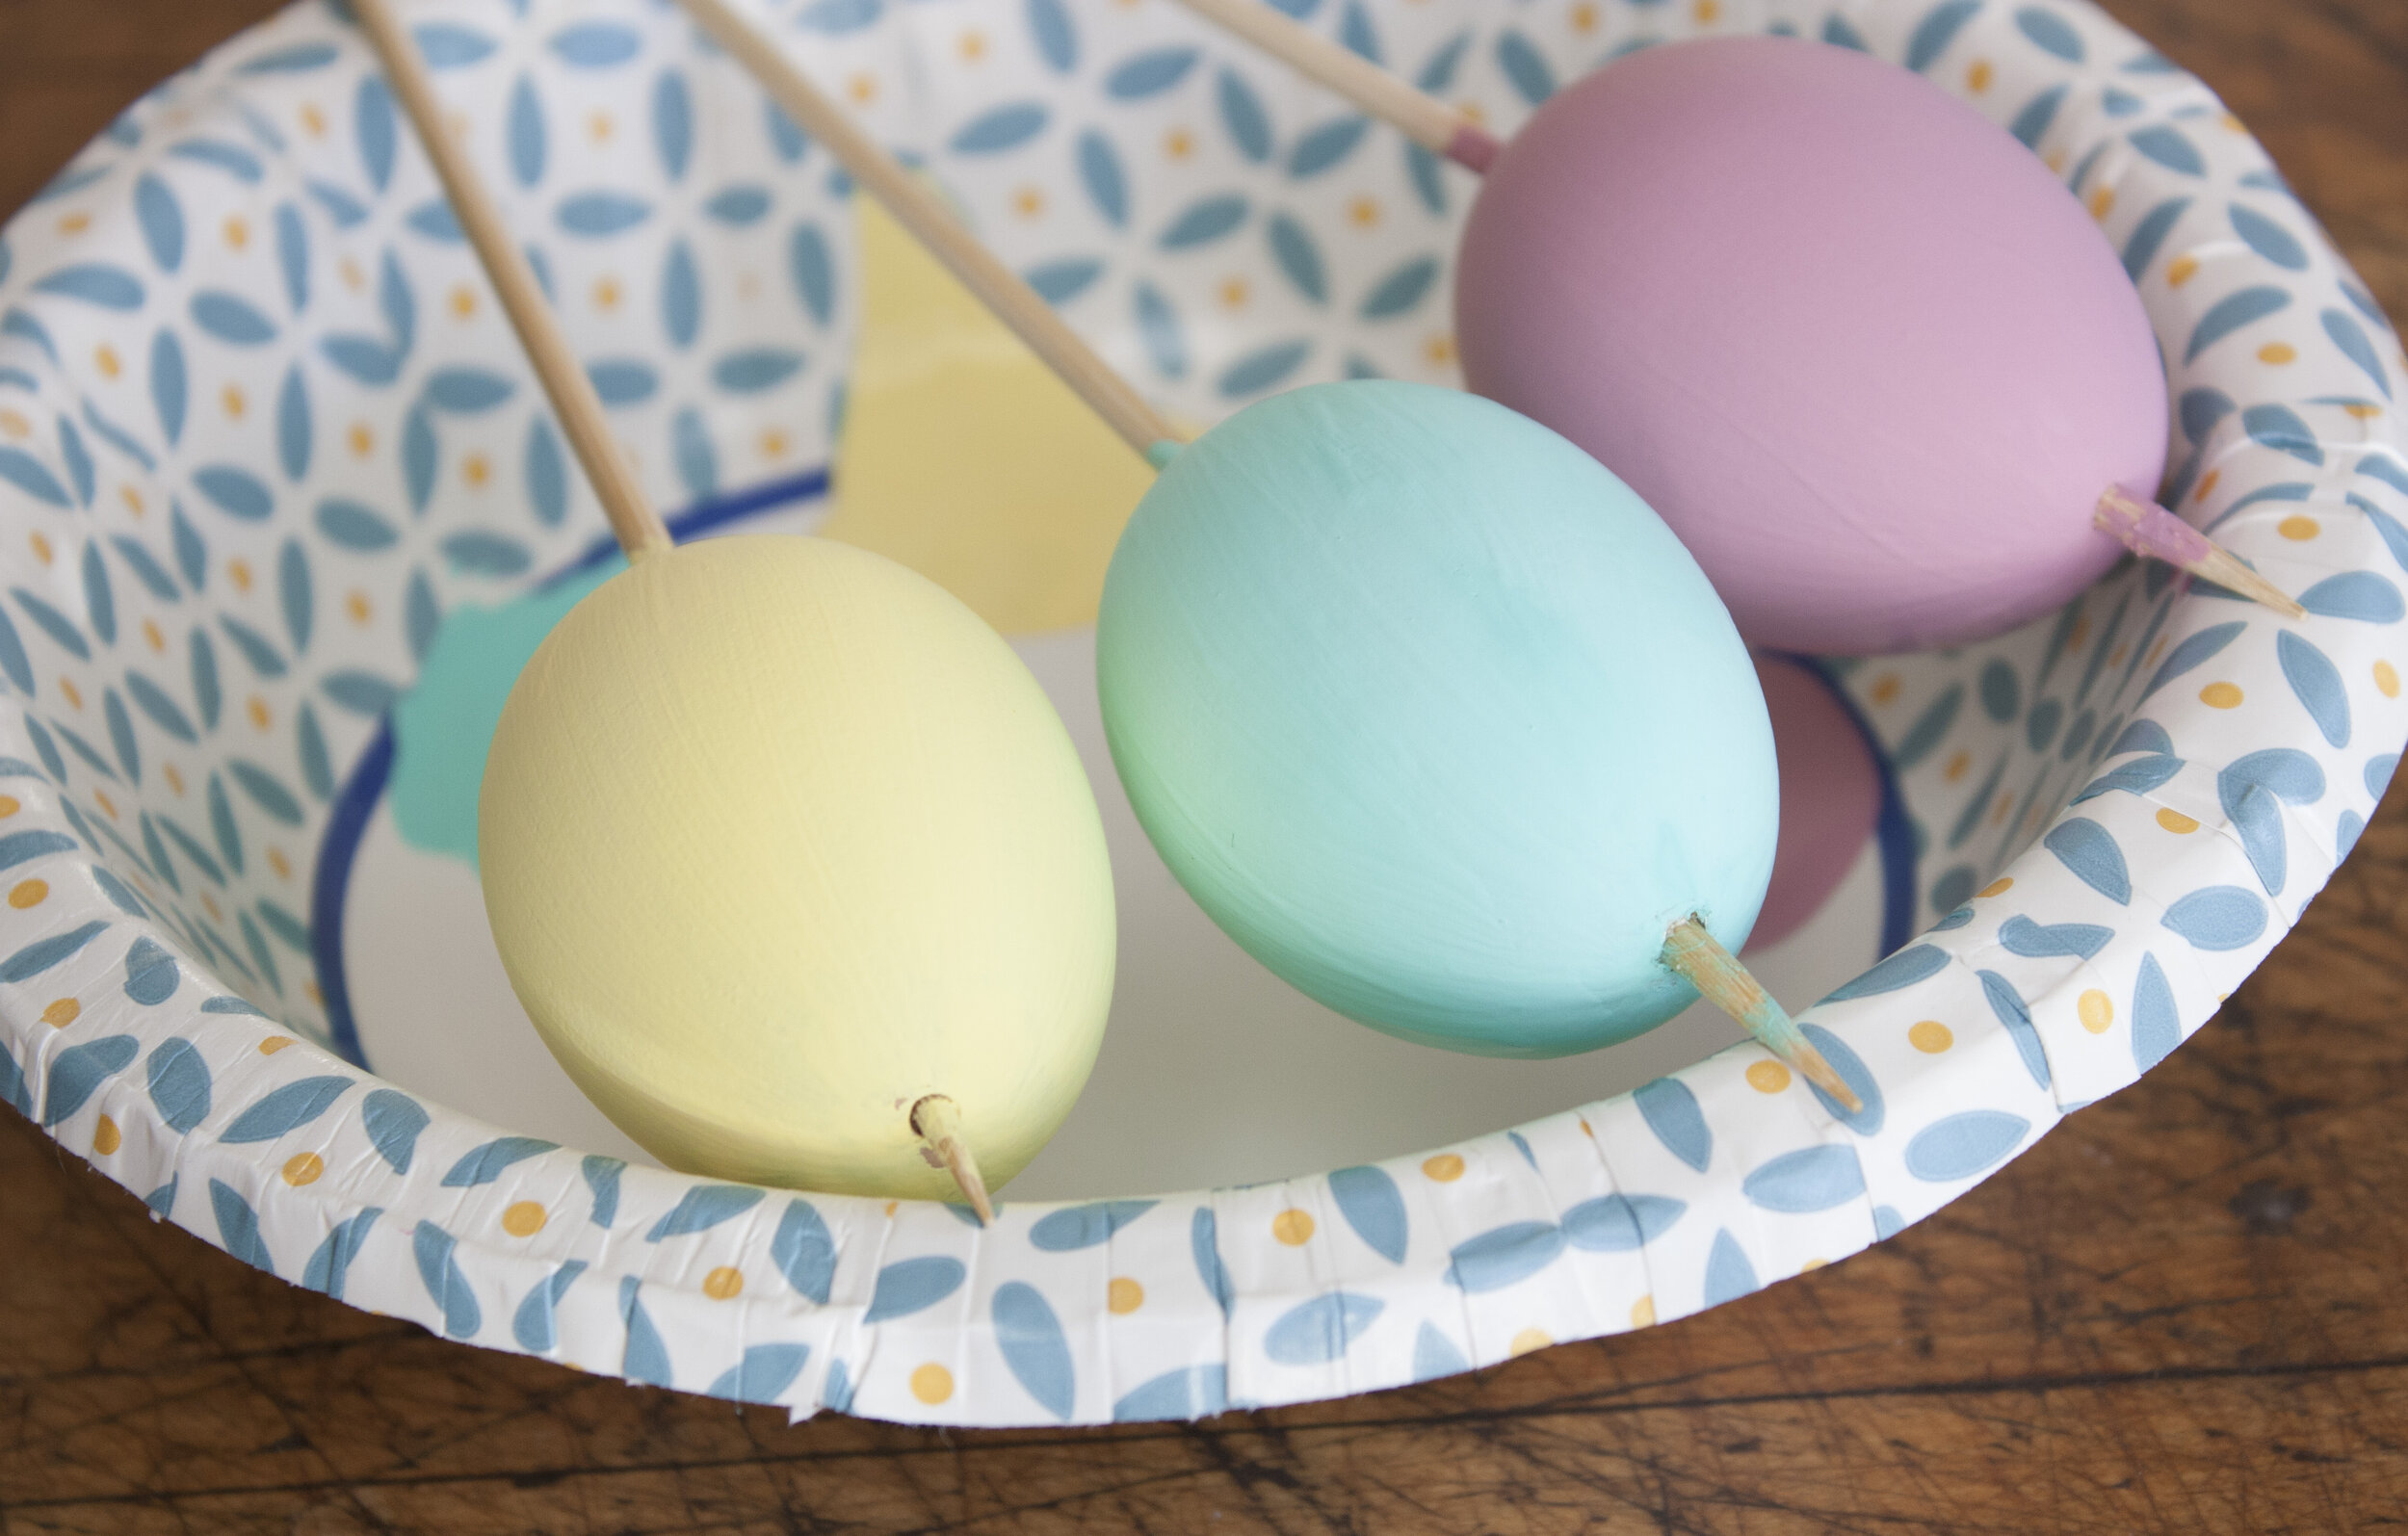
8. Let it dry. If you would like to paint your egg, you can use acrylic paint, which you can get in any craft store. I usually do two coats and let it fully dry for 20-30 min or longer before adding ribbon or string to the egg.


9. Add ribbon. I usually use a wooden skewer to pass the ribbon go through the egg, but if you have a long hook or large eye needle or wire, that would work even better. Just make a small hole at the beginning of the ribbon and slowly guide through the egg to the other side where you can use your fingers to get the ribbon out. Then just tied a knot or make a bow. Sometimes, I add a bead to the ribbon, which looks good and hides the hole.
TIP: If you decided to use a wide ribbon in the opening you made, get the knife, and enlarge the hole so the ribbon can fit nicely. Don’t worry, the hole will get covered with the ribbon.


Although blowing eggs for Easter decorations has been done for centuries, don’t get careless when handling raw eggs. Take care to wash your hands thoroughly with soap after removing the insides of the egg. Clean the area thoroughly with a disinfectant.
You can cook the discarded egg and make an omelet. I usually cook the egg right away to prevent illness.
I hope you have enjoyed this tutorial and made a beautiful Easter decoration. If you like this tutorial, please visit again. Thank you. Happy crafting!